For the Aquasports that don't have a bilge, like my 170, here is an option.
Parts needed:
1. Cheap bait bucket.
2. Bilge pump (I use a Rule 1000 gph)
3. Float switch (Again, Rule)
4. Piece of plexi wide enough to mount the pump and switch on and long enough to hang out about an inch on both sides of the bucket.
5. Weights to keep the bucket from floating.
6. PVC Pipe for exhaust (don't remember if it came with the pump)
7. Long enough hose to get over the transom and a hose clamp.
Construction Steps:
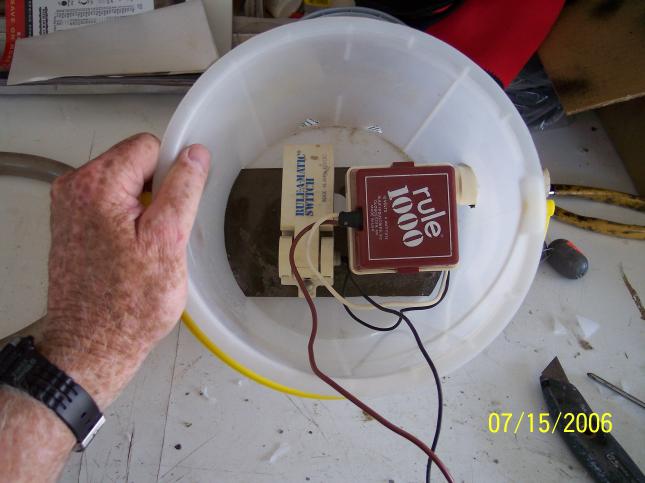
1. Mount the pump and switch on the plexi with stainless wood screws. Mount close to the center and make sure that the switch can move freely.
2. Connect the switch to the pump and add enough wire to the pump and switch to get from the back of your boat to your battery.
3. Remove the pump and switch from the plexi.
4. Mark the thickness and width of the plexi on the side of the bucket at the bottom - both sides of the bucket. Leave about 1/8" above the top of the bucket bottom.
5. Use a razor knife and cut the slot out of the bucket, both sides.
6. Slide the plexi through the slot on one side and out the other. Center it.
7. Remove the top from the bucket.
8. Mount the pump bottom and switch back on the plexi now that it is in the bucket.
9. Measure and cut a hole in the side for the discharge pipe to come through the side of the bucket.
10. Reassemble the pump in the bucket.
11. Tie the weights together so that they can straddle the plexi but not get in the way of the switch (I used fishing line of course). Add them to the bucket now.
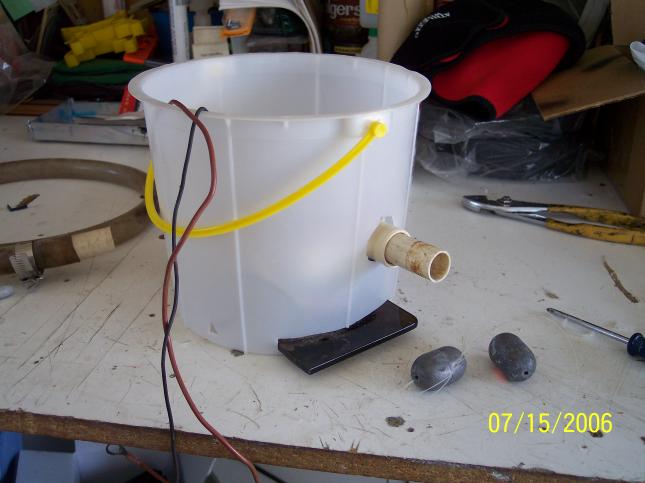
12. Cut a few triangular holes near the bottom of the bucket so water can get in.
13. Put the bucket in a 5 gal bucket, connect to a battery, start filling the bucket with water and see if it works. May have to cut more holes in it if it doesn't allow water into it fast enough for you. Don't cut too many or the bucket will be unstable. (EDIT: I ended up cutting about 6 holes per side)
14. Connect the hose to the exhaust tube so you know how to do it.

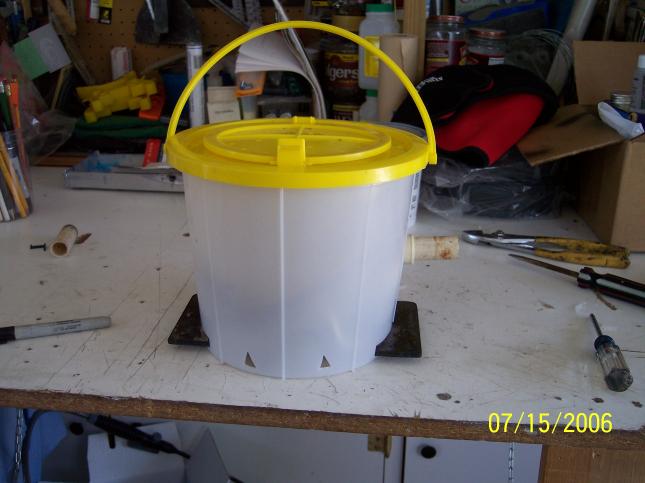
15. Put the lid back on the bucket.
16. Take the hose off, roll it up and put it in the bucket.
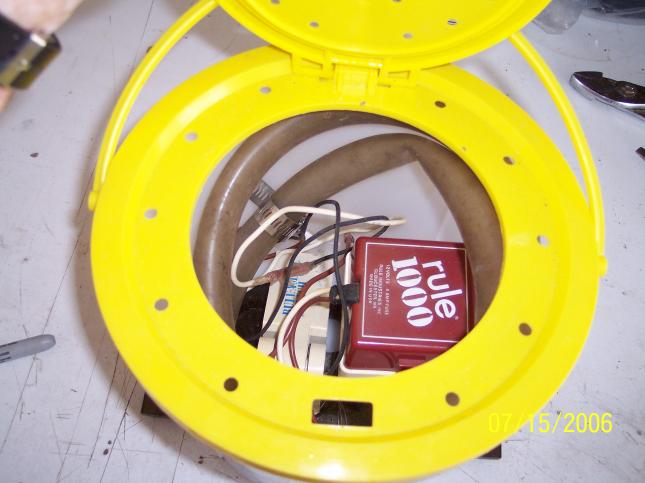
17. Close the lid and store under your bench seat or wherever else is convenient.
I carry it with me but have never had to use it (knocking on wood).

