For those whom have an older model 170 or any older model that was not manufactured with a livewell, and have not yet to or will not be installing a thru hull pickup, the fabrication details that follow can be used to secure a transom mounted pump to the transom.
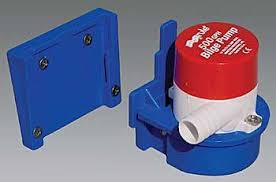
The transom mounted rule pump pictured below is the setup I used to use. The blue plate fixes to the transom with 4 screws and the pump slides in and out of the bracket. Well, I've gone through 2 of these pumps and not because they burned out...oh no. But because the pump came out of the bracket while underway. First time it happened I thought I must of not slid-in/locked-in the pump correctly to the bracket. So I bought another one ($60...the pump and bracket are not sold separately). Not too long after buying the 2nd pump the same thing happened. Suffice it to say I did not buy a 3rd. I highly recommend staying away from the rule transom mounted pump. There is definitely a flaw with the way the pump locks into the bracket.
Bought a tsunami pump and bracket from walmart, el cheepo. I believe this pump is actually intended to be used as a bilge pump by the looks of the black bracket. Now I had to figure out how to fabricate the means to secure the pump to the transom AND have the ability to remove the pump/bracket when not in use. Details of this fabrication is as follows:
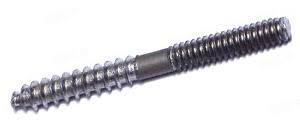
Hanger bolt
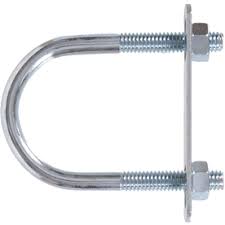
U-Bolt
*Get yourself a block of HDPE with thickness of 3/4"- 1". Cut length and width of HPDE to same as pump's bracket.
*Under-drill 2 holes for the screws used to secure a block of HDPE to the transom. Over-drill these 2 holes to the depth of the 2 screw heads used to fix HPDE to transom (countersink).
*The pump bracket I’m using has 3 mounting holes in a triangular shape, 2 on top and 1 on bottom . Using the bracket as the stencil, mark these 3 holes on the HDPE and under-drill the holes, but do not completely drill through HDPE. Slowly drill in 3 hanger bolts to the depth just less than the thickness of HDPE.
*Cut a piece of 1/4” starboard to the width of hanger bolts and 1.5”-2" in height.
*Using the HPDE with hanger bolts as stencil, mark the width of the top hanger bolts onto the piece of starboard. Drill out these 2 holes and drill 2 more holes through starboard, each one inline and 1/2” above the holes to be used for the hanger bolts (diameter of these 4 holes is dependent upon the diameter of hanger bolt and U-bolt you use).
*Now you’ve got 2 fabricated components and the pump bracket. Fix the piece of HDPE to the transom and countersink screws below flush. Be sure to coat screws with silicone sealant and run a thin bead of sealant around the HDPE where it seats against transom.
*Slide the pump bracket onto the hanger bolts. Use the largest diameter SS fender washer the space allows, followed by a SS nylon nut to secure together the bottom hanger bolt and bracket.
*Slide the bottom two holes of the 1/4” starboard over the top two hanger bolts. Use 2 SS washers and SS nylon nuts to secure starboard onto the hanger bolts.
*Insert pump into bracket. Slide 2 ends of U-bolt around pump and through starboard top 2 holes. Use 2 SS washers and nylon nuts to secure U-bolt to starboard.
*Slide on pump outlet tubing and secure it with SS hose clamps.
*The pump bracket will undergo stresses while the boat is underway caused by pressure and weight of the sea (this lesson cost me $120 for two pumps). Test the bracket’s integrity by grabbing the tube high above the outlet and pushing/pulling up and down. If the U-bolt is screwed down tight enough against the pump there should be no movement of bracket. You don’t want any bracket movement!! When needing/wanting to remove just the pump, remove U-bolt....When needing/wanting to remove both pump and bracket, remove U-bolt and starboard.
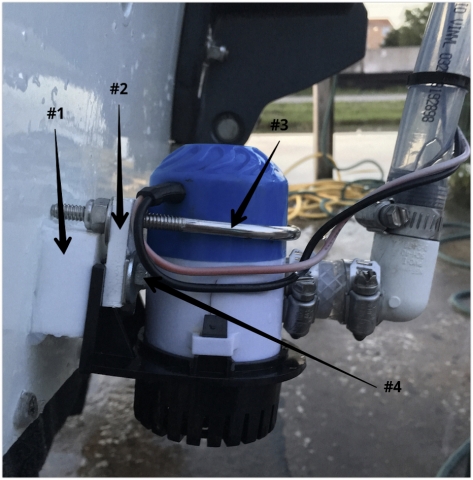
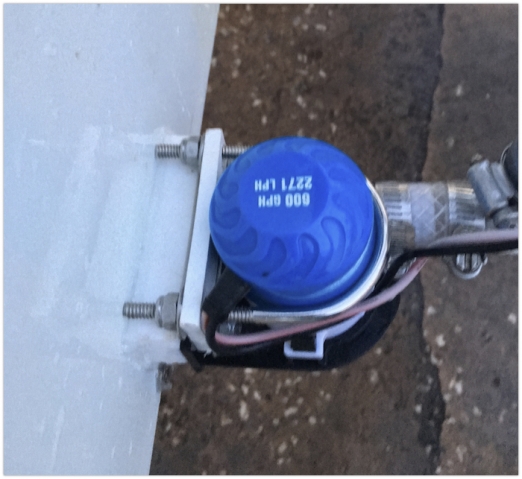
The pictures below are the finished fabrication. The black arrows are pointing to:
#1....Block of HDPE
#2....Starboard
#3....U-bolt
#4....Nylon nut for hanger bolt